Solar fence lights are an excellent way to add a decorative touch to any outdoor space. They are easy to install, require no wiring, and use the sun’s energy to power the lights. Installing solar fence lights without nails is possible and requires only a few tools. With the right materials and a few simple steps, you can have your solar fence lights up and running in no time.
Installing solar fence lights without nails is a great way to keep your fence looking stylish and modern without the hassle of drilling or hammering. Plus, it’s environmentally friendly and cost-effective. So if you’re looking to add some flair to your outdoor space, read on to find out how to install the best solar lights for chain link fences without nails.
Benefits of installing solar fence lights without nails
Solar fence lights are one of the most versatile outdoor lighting options available. They offer several benefits, including ease of installation and no need for electricity or wiring. Plus, they require no maintenance and come with a long lifespan. Solar fence lights are an excellent choice for decorative lighting in your garden, backyard, or along the driveway. Plus, they’re completely weather resistant and can withstand both indoor and outdoor conditions.
Solar fence lights are a great option for those who are looking to add a bit of flair to their space while keeping things eco-friendly and cost-effective. Another benefit to installing solar fence lights is that they give you the freedom to place them wherever you want. This can be particularly important if you have a large property and want to add some extra light to certain areas.
You can install them as close to the ground as you’d like without having to worry about power cables being visible. Solar fence lights are a great choice for those who want to add lighting to their outdoor space but don’t want to deal with electrical wiring. They are easy to install and have no negative impact on the environment.
Tools needed to install solar fence lights without nails
If you’re planning on installing solar fence lights without nails, you’ll need to grab the following tools first.
– Utility knife – A utility knife is a handy tool that can be used for all sorts of different things, including cutting through the plastic on solar fence lights.
– Measuring tape – A measuring tape is an essential tool when it comes to any type of installation and will help you accurately measure the distances between your fence posts.
– Marker – A marker is a good idea so you can mark the locations where you’ll need to place your fence posts.
– Step-by-step guide to installing solar fence lights without nails Here’s a step-by-step guide to installing solar fence lights without nails.
– Select a location for your fence posts – To get started, select the location for your fence posts. It’s best to place them in an area that gets lots of suns, allowing the solar fence lights to charge throughout the day. The fence posts should be at least 8-12 inches in the ground.
– Measure the distance between your fence posts – Once you’ve selected your fence post locations, use your measuring tape to get an accurate measurement between the posts. This will help you determine the length of your fence panels.
– Mark the locations of your fence posts – Mark the locations of your fence posts so you know exactly where they should be installed. It’s helpful to use small flags or some other indicator so you know where to put the posts once you get started.
– Install your fence posts – Once you’ve got all your tools and supplies together and drawn your fence layout, it’s time to install your fence posts. Start by digging a small hole at the location where you plan to place your fence post. Once the hole is dug, place the fence post inside and fill the hole back in with dirt.
– Install your solar fence lights – Now it’s time to install your solar fence lights. Start by removing the plastic covering from the solar lights. Be sure to follow the manufacturer’s instructions when detaching the plastic covering.
– Attach the solar fence lights to your fence posts – Attach the solar fence lights to your fence posts. You can do this by screwing them or using nails. If you’re installing solar fence lights without nails, you’ll likely want to use screws.
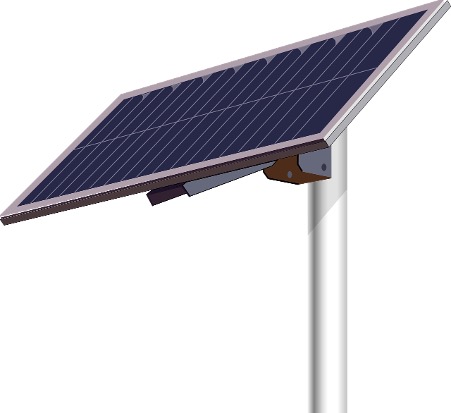
– Place the solar panel in direct sunlight – Place the solar panel in direct sunlight so the solar fence lights are charged throughout the day. You should see lights turn on and off as the sun rises and falls throughout the day.
– Tips for a successful installation When installing solar fence lights without nails, there are a few tips that can help you make sure everything goes smoothly.
– Select a location for your fence posts – Before you start installing your solar fence lights without nails, you’ll want to select a location for your fence posts. Make sure you select a location that gets plenty of suns, as this will ensure the solar fence lights are charged throughout the day.
– Measure the distance between your fence posts – Once you’ve selected your fence post locations, use your measuring tape to get an accurate measurement between the posts. This will help you determine the length of your fence panels.
– Mark the locations of your fence posts – Mark the locations of your fence posts so you know exactly where they should be installed. It’s helpful to use small flags or some other indicator so you know where to put the posts once you get started.
– Install your fence posts – Once you’ve got all your tools and supplies together and drawn your fence layout, it’s time to install your fence posts. Start by digging a small hole at the location where you plan to place your fence post. Once the hole is dug, place the fence post inside and fill the hole back in with dirt.
– Install your solar fence lights – Now it’s time to install your solar fence lights. Start by removing the plastic covering from the solar lights. Be sure to follow the manufacturer’s instructions when detaching the plastic covering.
– Attach the solar fence lights to your fence posts – Attach the solar fence lights to your fence posts. You can do this by screwing them or using nails. If you’re installing solar fence lights without nails, you’ll likely want to use screws.
– Place the solar panel in direct sunlight – Place the solar panel in direct sunlight so the solar fence lights are charged throughout the day. You should see lights turn on and off as the sun rises and falls throughout the day.
– Additional considerations If you’re installing solar fence lights without nails, you may want to consider using fence posts with a decorative top. This will help your fence posts blend in and be less noticeable while also supporting your solar fence lights.
For such more useful information and posts, visit our website.